WordPress 7.1 beta is now available for testing, and we have been running it on our test sites for the past week.
The official release is scheduled for August 19, 2026, timed with WordCamp US.
While WordPress 7.0 rebuilt the admin and introduced the AI Client, 7.1 turns to the editor. For the first time, you can design for tablets and phones, and style hover and focus states, without writing a line of CSS.
Let’s take a look at what’s coming in WordPress 7.1, with screenshots and examples of how each feature works.
TL;DR: What’s coming in WordPress 7.1
- Notes get a major upgrade with @mentions, the ability to add notes to specific text, support for multiple discussion threads, and rich formatting.
- Responsive styling lets you control how blocks look on tablets and phones, directly in the editor, without custom CSS.
- A new image editor and smarter media handling, including HEIC support and uploads pause if your connection drops, then continue when you are back online.
- New Tabs and Playlist blocks, plus the admin toolbar now stays visible while you work in the editor.
Note: This beta release is for testing and development only. So, please do not install, run, or test this version of WordPress on your live website.
Instead, we recommend using a staging site or a local site. You can test WordPress 7.1 Beta by installing and activating the WordPress Beta Tester plugin.
- When Is WordPress 7.1 Coming Out?
- Collaborate Better With the Upgraded Notes
- Responsive Styling Without Writing CSS
- Style Hover and Focus States for Buttons
- New Tabs Block
- New Playlist Block
- Block Improvements in WordPress 7.1
- A New Image Editor in WordPress 7.1
- Smoother and Smarter Media Handling
- The Admin Toolbar Now Stays Visible When Editing
- A More Personal, More Navigable Admin
- What Didn't Make It Into WordPress 7.1?
- Under the Hood (Developer & Performance Updates)
When Is WordPress 7.1 Coming Out?
WordPress 7.1 will be released on August 19, 2026, which is the final day of WordCamp US 2026. The date is still marked tentative on the official WordPress release schedule, so it could shift if testing uncovers a serious bug.
Before then, WordPress 7.1 will go through two release candidates, on August 5 and August 12. Those are near-final builds, so you will know exactly what is in the release by early August.
Collaborate Better With the Upgraded Notes
The Notes feature arrived in WordPress 6.9 as a simple way to leave comments on blocks. WordPress 7.1 will turn it into a proper feedback system.
The most useful addition is @mentions. Typing ‘@’ inside a note brings up a searchable list of collaborators to tag directly. This makes it much easier to direct feedback to the right person on your team.
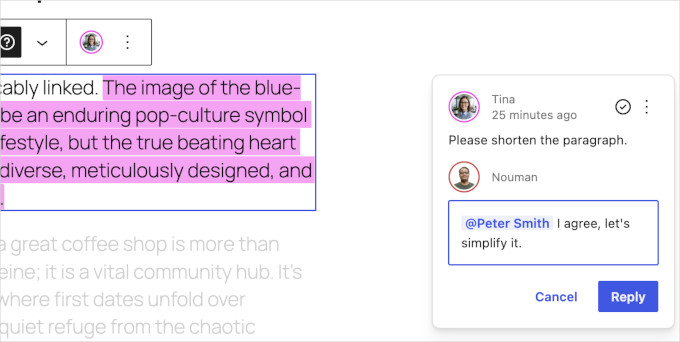
Inline notes are new too. Instead of attaching a comment to an entire block, you can select a specific sentence or phrase and leave a note on just that text. The selection stays highlighted, so everyone can see exactly what the note refers to.
This removes a lot of guesswork. Previously, a note saying “please rephrase this” could apply to anything in a long paragraph. Now, it points at the exact words.
Other Notes improvements include:
- Multiple threads: More than one conversation can run on the same block, instead of folding every comment into a single thread.
- Text formatting: Notes now support bold, italic, code, links, and emoji.
- Show more / show less: Long notes collapse by default to keep the sidebar tidy.
These changes make Notes genuinely useful for teams, agencies, and multi-author blogs.
Responsive Styling Without Writing CSS
You can now define how a block looks at different screen sizes directly in the editor.
For example, a smaller font size for headings on mobile, or different spacing for tablets, without writing a single line of CSS.
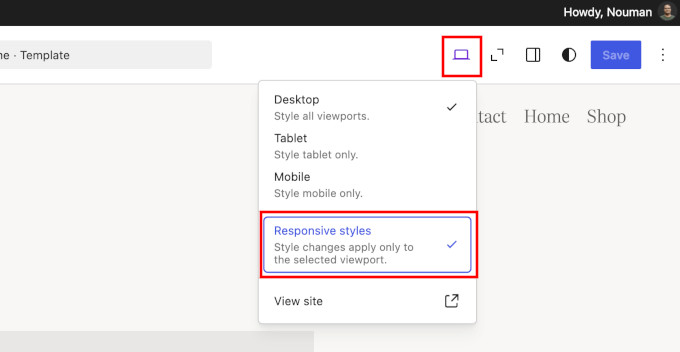
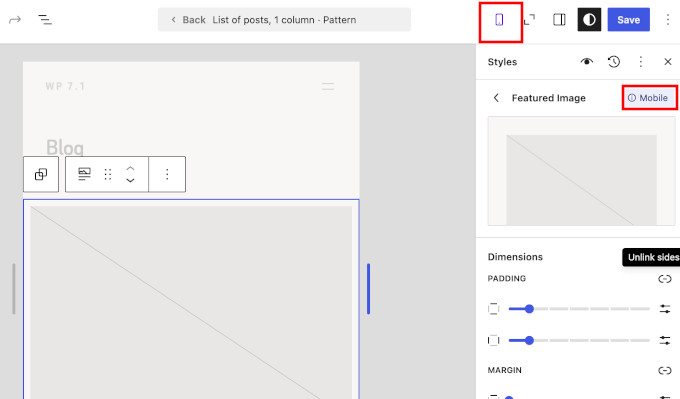
When you switch the editor preview to Tablet or Mobile, any style change you make applies only to that screen size.
WordPress also shows a small badge in the block settings panel, so you always know which screen size you are styling.
It works on two levels. Responsive styles set in Global Styles apply to every instance of a block across your site. Styles set on a single block apply only to that page.
The editor canvas is also more flexible. Instead of being limited to the Desktop, Tablet, and Mobile preview presets, you can drag the canvas to any width and watch your blocks respond in real time.
In our testing, this felt natural very quickly. Theme developers can even define their own breakpoints in theme.json, so the preview widths can match the theme you’re actually using.
If you style one block and then decide you want that look everywhere, applying the change to Global Styles brings up a quick review step. You can choose exactly which modified styles to apply globally and keep the rest as local overrides.
Style Hover and Focus States for Buttons
Alongside responsive styling, WordPress 7.1 will introduce interactive state styling. A new ‘States’ dropdown lets you visually style how blocks respond to interaction.
The most common use case is buttons: you can now set a different background color for hover, focus, or active states and preview the change live in the editor.
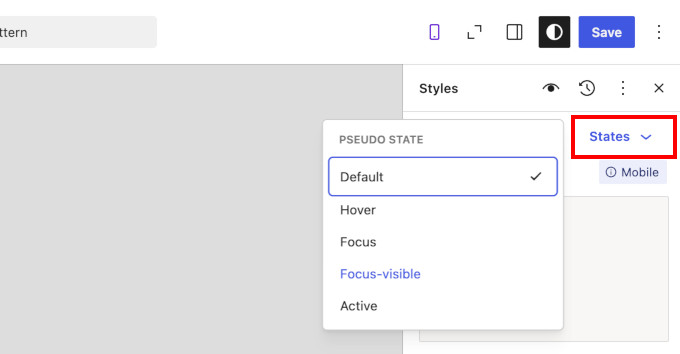
Until now, changing a button’s hover color meant writing custom CSS, even though it’s a tiny change. Now, it’s a built-in design option.
New Tabs Block
WordPress 7.1 will add a Tabs block that many users have been asking for.
Tabs let you organize content into clickable panels instead of showing everything at once. They are great for product specifications, FAQs, or comparing options without making a page feel long.
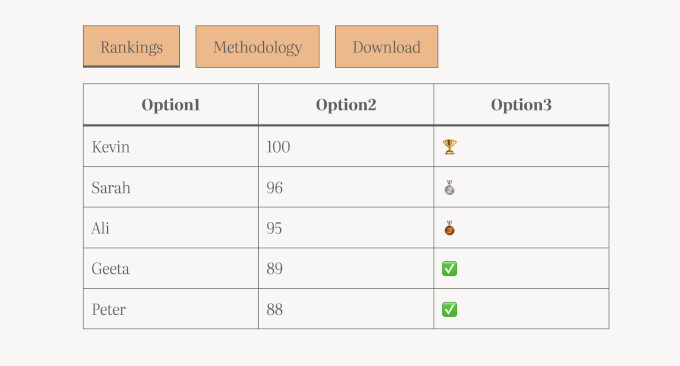
Previously, you had to add tabbed content using a plugin. Just keep in mind that tabs you already built with a plugin will not convert to this core block automatically.
New Playlist Block
The second new block in WordPress 7.1 will be the Playlist block. It lets you add a collection of audio files to any post or page. You can also show your track’s title, artist, and cover art, plus a waveform graphic of the audio.
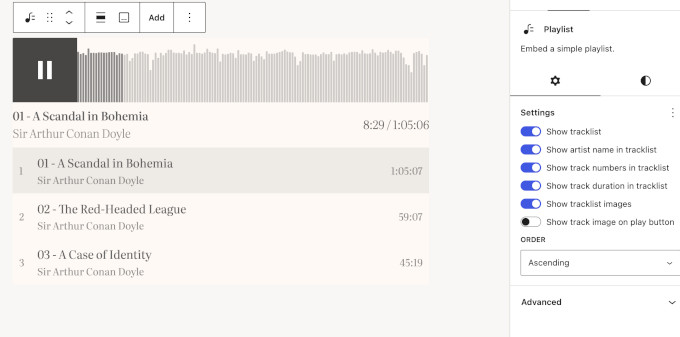
This is most useful for musicians, churches, educators, and anyone else who publishes audio. If you run a podcast with WordPress, then you can add a set of episodes to one player on a page.
Block Improvements in WordPress 7.1
Several existing blocks will get meaningful upgrades in this release:
- Background gradients and images work together: You can now layer a gradient over a background image in the Group block (and several other blocks) without the two conflicting. This is handy for keeping text readable over hero images.
- Text shadows: Themes can now set a text shadow through theme.json, either globally, on specific blocks, or on elements like links. For now it only works in theme.json, so there is no setting in the editor yet.
- Editable content inside the HTML block: The HTML block now supports editable nested blocks. This is especially useful when working with AI-generated layouts, which often arrive as custom HTML.
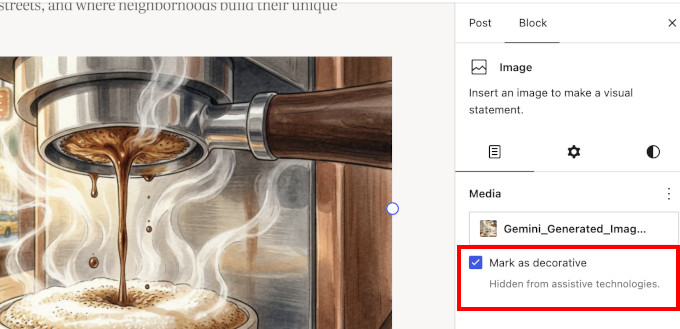
- Mark images as decorative: A new toggle on the Image block lets you mark purely decorative images so that screen readers skip them. This is an easy accessibility win, because decorative images with meaningless alt text are one of the most common accessibility mistakes.
- Smarter shortcode handling: Pasting or converting an embed shortcode now creates a proper Embed block instead of leaving raw shortcode text behind.
- Grid transforms: Columns and Gallery blocks can now transform into Grid layouts while preserving their content.
- Icon block upgrades: The Icon block, added in WordPress 7.0, now lets you flip and rotate icons. It also starts with a default icon instead of an empty placeholder, and the picker groups icons into collections so you can browse them more easily. Plugins and themes can now register their own icon sets, so expect branded icon libraries from your favorite plugins.
A New Image Editor in WordPress 7.1
WordPress 7.1 will replace the old inline cropping tool with a dedicated Media Editor modal.
The entry point stays familiar. You still click the Crop button on an Image block.
But instead of the cramped inline controls, a full editing modal opens with freeform cropping, aspect-ratio presets, flip and rotate controls, and metadata editing in one place.
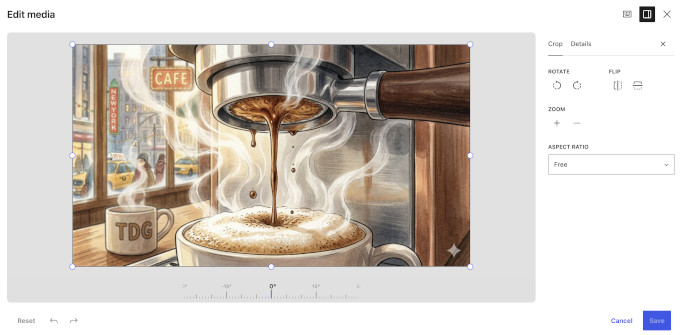
The new editor also works with the Cover block, so you can crop a background image right where you use it.
This won’t replace a full photo editor. However, for the basic image editing most site owners actually do, it is a big usability win.
Smoother and Smarter Media Handling
In WordPress 7.1, your web browser does most of the work of processing images before they are uploaded to your server. It resizes, compresses, and converts them, and creates the smaller thumbnail sizes that WordPress needs.
There are two benefits. Your server does much less work, which means fewer failed uploads on limited hosting plans. And WordPress can now handle more image formats, including HEIC, which is the default format on iPhones, plus UltraHDR, AVIF, and WebP. It can also convert animated GIFs into more efficient videos.
HEIC is the biggest change here. Until now, HEIC uploads depended on your web host, because WordPress needed a recent enough version of the image software on the server. Some iPhone users had to convert HEIC to JPG before uploading.
With 7.1, your browser does the converting instead. This works in Chrome and Edge, and Safari can handle iPhone photos too. In Firefox, WordPress still passes the job back to your server. Uploads are also more reliable. If your internet connection drops mid-upload, the queue pauses and resumes automatically when you are back online. A progress indicator keeps you informed for batch uploads.
There are smaller everyday improvements too:
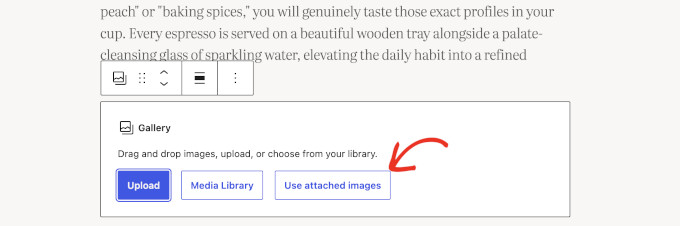
- Smarter galleries: A new dynamic Gallery mode can automatically pull in and sort media already attached to the current post.
- Attached images in the inserter: After you upload images to a post, they appear in a new ‘Attached images’ section, so you don’t have to dig through the whole Media Library.
- Infinite scrolling: The Media Library grid now loads more items automatically as you scroll. You can turn this off in your user profile.
Together, these changes mean fewer upload errors and less load on your server. That’s especially good news if you’re on a budget WordPress hosting plan.
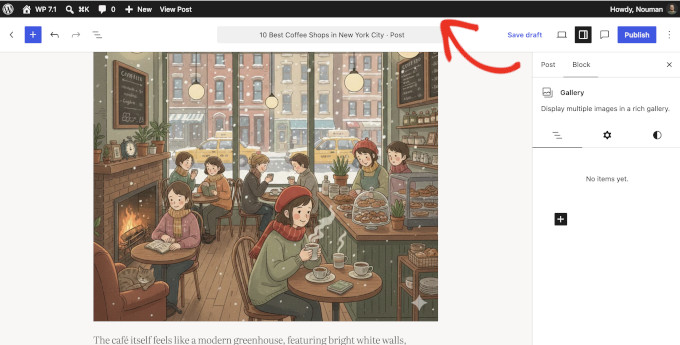
The Admin Toolbar Now Stays Visible When Editing
WordPress 7.1 will make the admin toolbar stay visible in the Site Editor and the Block Editor, instead of disappearing when you start editing.
The toolbar itself is also getting a design cleanup as part of this change:
- A clear back button (chevron) replaces the confusing W logo that used to double as a back button.
- Your site icon now appears in the toolbar, and your profile avatar is a circle instead of a square.
- The old Dashicons icons are replaced with modern SVG icons.
The toolbar stays hidden in Distraction Free mode, so you still get a clean writing canvas.
A More Personal, More Navigable Admin
Beyond the toolbar, WordPress 7.1 will include a set of smaller admin improvements that add up.
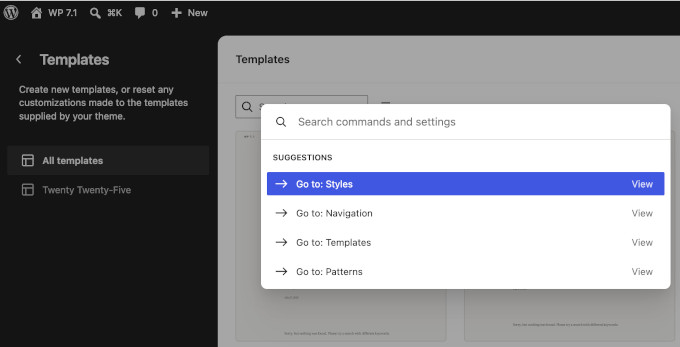
Command Palette improvements: The Command Palette (Ctrl+K on Windows, Command+K on Mac) now groups results into Recent, matching, and Suggestions sections. Your recently used commands are saved to your preferences, so they persist across sessions.
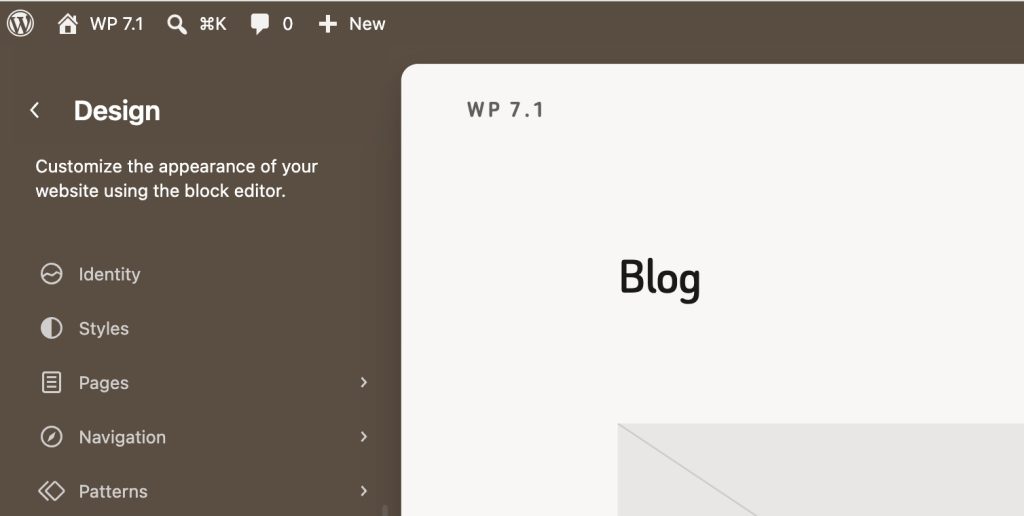
Your admin color scheme in the Site Editor: The Site Editor now reflects your chosen admin color scheme instead of always using a fixed dark sidebar. This is a small thing, but it makes the whole admin area feel consistent.
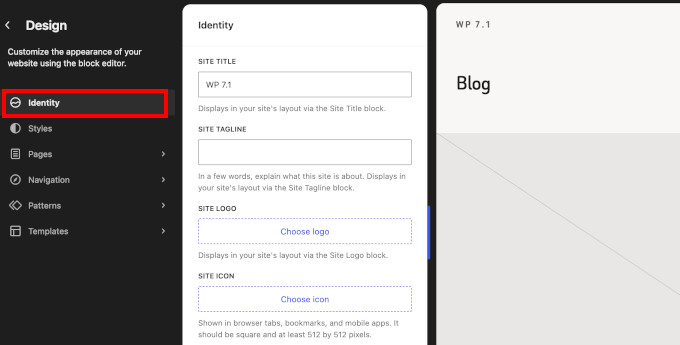
A dedicated Identity section: Site identity settings like your title, tagline, logo, and site icon now live in their own clearly labeled Design » Identity section in the Site Editor. You no longer need to hunt through Settings and templates to update these basics.
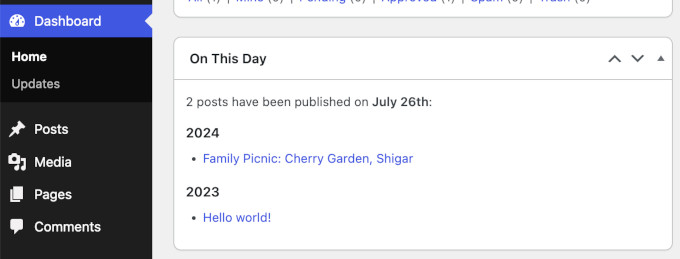
On This Day widget: A new dashboard widget resurfaces what you published on this date in past years. It’s a fun nudge for long-running blogs, and useful for finding old content worth updating.
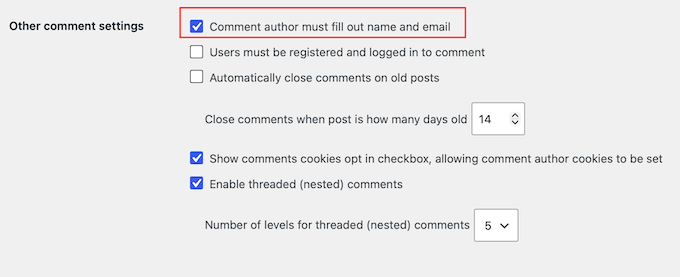
Change a comment’s parent: The Edit Comment screen will add an editable ‘In reply to’ control, so you can finally re-thread a comment that ended up under the wrong reply. It works within a single post, not across posts.
What Didn’t Make It Into WordPress 7.1?
We want to be upfront: real-time collaboration will not ship in WordPress 7.1. If you followed our WordPress 7.0 coverage, then you may remember that Google Docs-style real-time collaboration has been in development for a while.
The feature is enabled in the Gutenberg plugin, where multiple people can already edit the same post together.
However, the core team is still working through big decisions, including how collaboration data should be stored and whether to ship the full feature or just the underlying architecture first.
There is a dedicated community testing effort that will continue beyond the 7.1 cycle to get collaborative editing ready. Until it lands in core, you can add collaboration to the block editor with a plugin.
We think that caution is the right call. A collaboration feature that loses someone’s work would be far worse than a delayed one.
Similarly, support for Unicode (non-Latin) email addresses was originally planned for 7.1 but was pulled during beta testing. That work will continue in a community plugin for broader compatibility and security testing before it lands in core.
Under the Hood (Developer & Performance Updates)
WordPress 7.1 will also ship several technical improvements for developers and site performance:
- The post editor is always iframed: In WordPress 7.1, the editing area always runs inside an iframe. Until now, WordPress turned this off if the page contained a block built on an older version of the Block API This means the editing canvas is isolated from admin styles in every case. Blocks using Block API v2 or lower should be updated to v3 for compatibility, and until a third-party block’s developer does that, it may not look or behave the same inside the editor. (Details)
- Icons API goes public: New functions like
wp_register_icon_collection(),wp_register_icon(), andwp_get_icon()let plugins and themes register custom icon sets with server-side rendering and REST API endpoints. SVGs are sanitized against a strict allowlist. (Dev note) - Design system maturity: The
wordpress/themepackage introduces design tokens and a stable React ThemeProvider for consistent UI theming. (Details) - Connectors authentication: The Connectors framework will support username and application-password login in addition to API keys. (Details)
We are looking forward to the release of WordPress 7.1. It may not have a single blockbuster feature, but it fixes a long list of everyday annoyances, and that matters more for most website owners.
Our favorite additions are the upgraded Notes and responsive styling. The ability to tag a teammate on an exact sentence brings WordPress much closer to a modern editorial tool.
If you liked this article, then please subscribe to our YouTube Channel for WordPress video tutorials. You can also find us on Twitter and Facebook.
The post What’s Coming in WordPress 7.1? (Features & Screenshots) first appeared on WPBeginner.
from WPBeginner https://ift.tt/CYz75VP
via IFTTT